A short while ago I teased a new filter live on stream, and now that the Nvidia counterpart for it is publicly released I can finally go into more detail on what it does, why it is useful, and how you too can now use it on your Nvidia GeForce RTX hardware.
What does the Filter do?
In simple terms it keeps the Region of Interest always close to the center of the frame, which is usually the face of a content creator. Cropping and zoom is handled automatically and adjusted live while you move around. Get closer to the camera and it zooms out, go further away and it zooms in. Just compare the images below to see what it can do automatically:
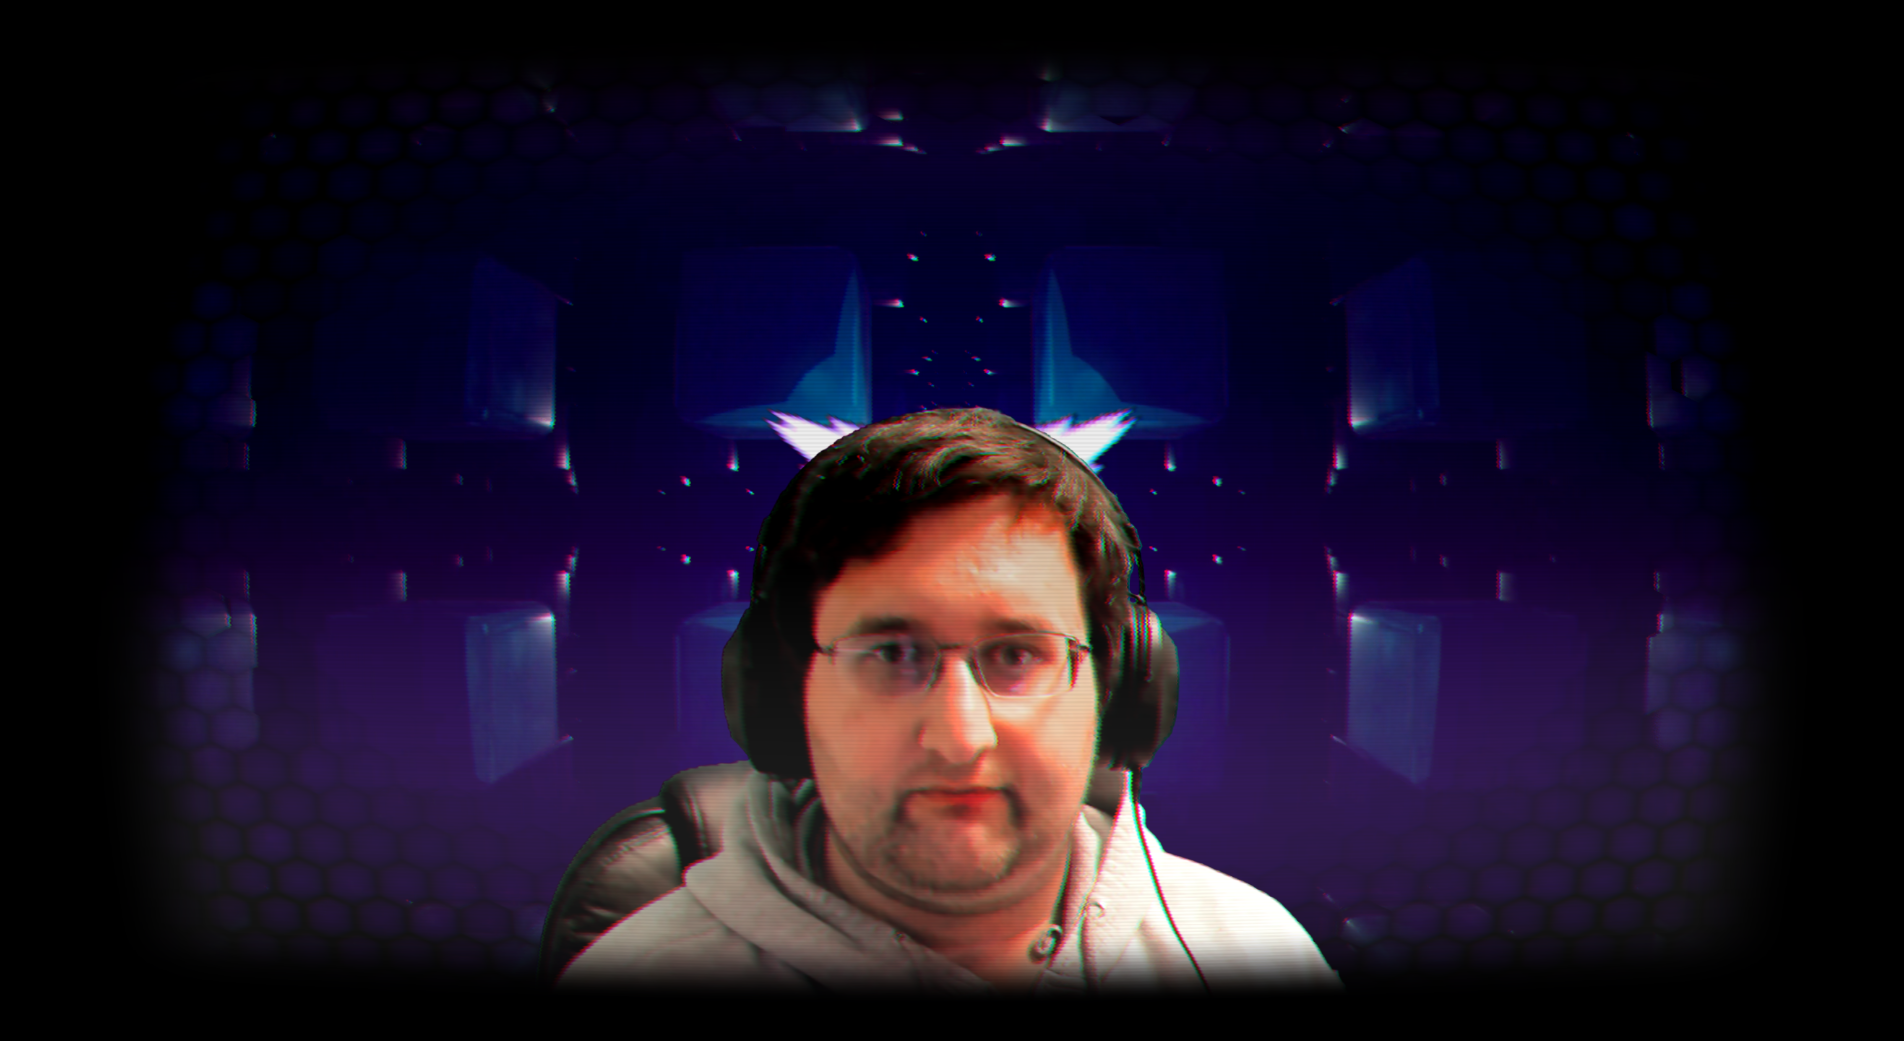
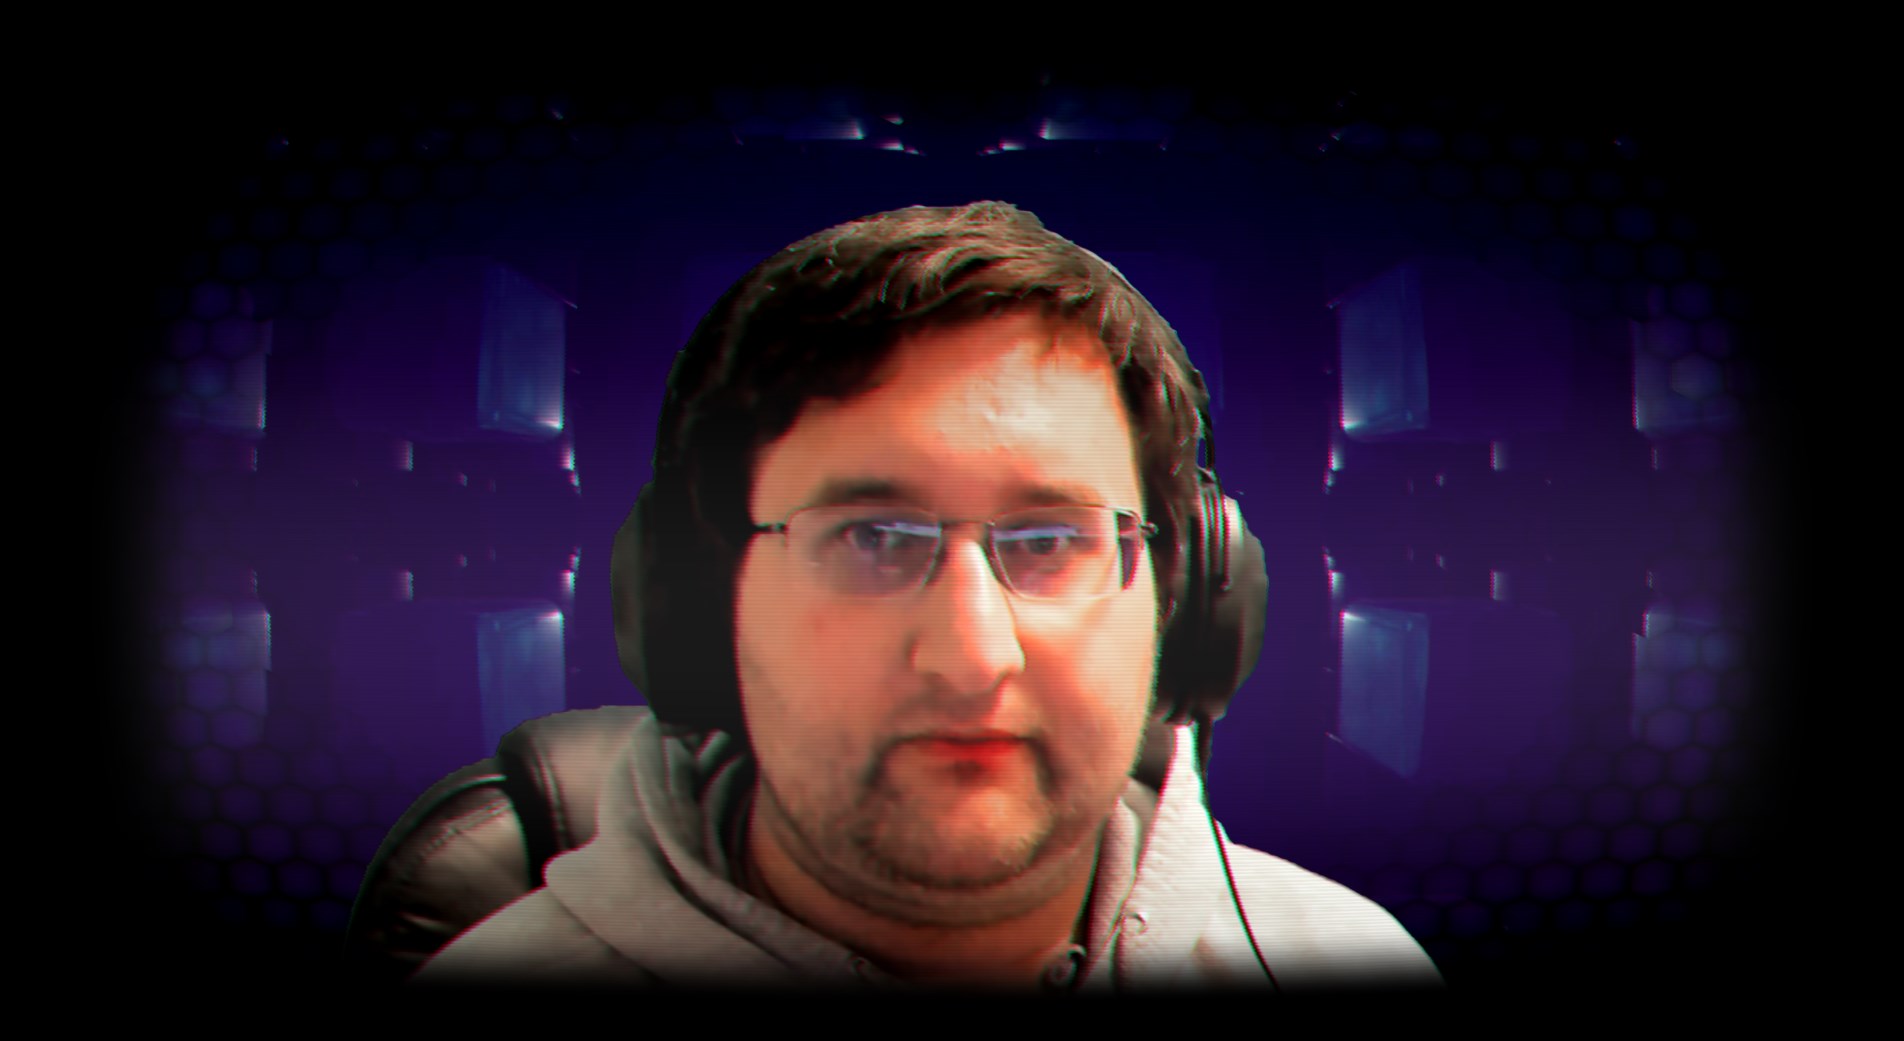
Effectively this filter simulates what it's like to have a professional camera operator following you on stage, always following where the action currently is. And the best thing is: it's free, and available now!
Why would I need this?
If you like moving around a lot, a manually cropped area only gets you so far. It's very restrictive, as you have a predetermined region of interest, and adjusting it takes a while to do. And that's exactly where this filter comes in.
In this video I've moved through the entire horizontal field of view, which I could not have done with a manually cropped region. Thanks to the new Filter the region of interest was almost always in the center. And of course, like with everything that I do, it can be fully customized to your personal needs. Whether you want it fully zoomed in to something or just slightly further away is entirely up to you. If you wanted you could even create this meme on the press of a button.
So how can I use it?
You'll need the latest OBS Studio, the latest version of the StreamFX plugin, any Nvidia GeForce RTX graphics card, and Windows. If you don't yet have StreamFX installed, you can easily install it by either following the official installation guide on YouTube, or following the text guide on the Wiki. If the plugin does not load, you will also have to install the most recent Microsoft Visual C++ 2015/2017/2019 Redistributables, which you can download directly from Microsoft.
Once you have both OBS Studio and StreamFX set up, it's time to install the Nvidia AR SDK Redistributables here. These are required for the filter to show up at all, and if they are not installed properly, or there was a problem during install, you will not be able to use it. Hopefully you now have everything set up.
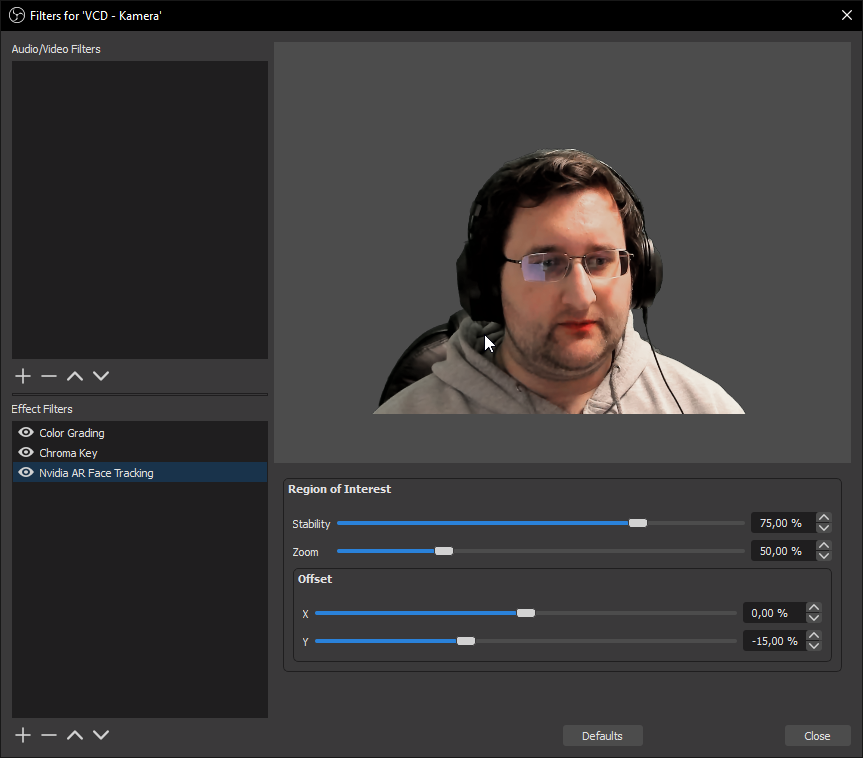
Now once you start (or restart) OBS Studio, a new filter should be available for you to choose on video sources called "Nvidia Face Tracking". Add this to your Video Capture source, and it should start its work immediately. Which leaves you with the final step, customizing the configuration. While the default values , chances are that you have a different camera, or have even gone the route of using an Elgato CamLink with a proper DSLR.
The options are very simple: Stability controls how fast it should respond to changes (lower values respond faster but are more unstable), Zoom controls the maximum zoom relative to the "full frame" zoom level, and Offset controls the relative offset to the detected region of interest. The default values are targeted at the Logitech Brio 4k with the Field of View set to 90°, so you should adjust the values for your needs and camera of choice.
Anything else?
And that makes up the gist of it. The filter itself is currently still experimental, but I'm working on optimizing it further so that it can be used at higher camera resolutions and also while playing GPU intensive games. At the current time it works great for variety streamers and dual PC content creators, so stay tuned for future updates!
Until then, have a nice week!